Inquiry
How should dentures be scanned, especially in edentulous cases?
Answer
To ensure accuracy, follow these instructions when scanning dentures.
Scan the entire denture starting with the fitting surface, moving on to the border, polished surface (palatal), and then the artificial teeth. Check to see if the Smart Scan Filter option is set to "No Filtering" before scanning a denture.
The Alveola ridge and Rugae are scanned to provide the foundation for the maxillary denture data when scanning the maxillary fitting surface. Be sure to include the vestibule and the frenum as you continue the border scan on the buccal side. Afterward, continuously scan the rugae and the entire posterior palatal surface. Start with the retromolar pad for the scanning mandible fitting surface, scan the alveolar ridge to establish a baseline, and then move to the other side of the retromolar pad. Take data from the vestibule and the frenum while scanning the labial and lingual. When scanning the data, if the same area consistently escapes the focus, click "Optimize" to remove any noise.
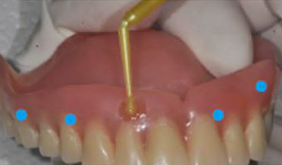
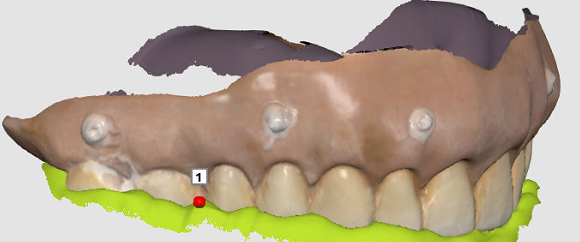
We advise using a resin marker and manually aligning the denture if, after using the denture scan guide above, the alignment is not satisfactory. After using a resin marker to create 5 to 6 marks on the gingiva that are between 1.0 and 1.5 mm in size, scan. After that, use Manual Alignment to set the denture's position correctly.
Comments
0 comments
Please sign in to leave a comment.