File Viewer groups and shows various data, including the data acquired from programs linked to Medit Link and data attached by users.
It provides basic management functions such as showing/hiding data, adjusting opacity, and deleting data.
It supports previews of files in the following formats:
- 3D data: STL, OBJ, PLY
- 2D images: PNG, JPG, JPEG, BMP, GIF, TIF, TIFF
- Video files: MKV, MP4, AVI, WMV
Please refer to the linked article for Full-Screen Mode.
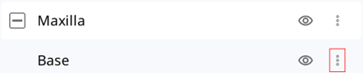
Data Tree
You can group and display all data for the case in the data tree. You can also show/hide data, adjust transparency, and delete data from the data tree.
 |
Show/Hide | You can show or hide the data. |
 |
Opacity |
The slide bar appears when you click one of the data on the data tree. You can adjust the opacity of the shown data by moving the slider bar.
|
 |
More |
Clicking the More icon shows additional features available.
|
ℹ️ Note
You can rename data when online.
Model Control Tools
3D Model Control
| Pan | Move the model. | ||
 |
Rotate | Rotate the model. | |
 |
Zoom In/Out | Zoom in and out on the model. | |
| Zoom Fit | Position the model in the center of the screen. | ||
|
Data Display Mode |
Glossy |
See the data in color with glossy finish (PBR rendering). |
|
| Matte |
See the data in color with matte finish (Phong rendering). |
||
| Monochrome |
See the data in one color. |
||
 |
Grid Settings (mm) | Grid On |
Shows the grid in the background. |
 |
Grid Off | Hide the grid in the background. | |
 |
Overlay On |
Overlay the grid over the model. |
|
2D Image Control
 |
Next/Previous Image | Move among images. |
 |
Edit | Edit the image. |
|
|
Pinch/Paste Window |
You can detach the image window and adjust it to the desired position. You can resize the window. When the window is restored to its original location, it returns to its default size. |


Function Tools
 Image Capture and Memo
Capture the current screen as a 2D image, draw on it, or add notes.
You can save it as a file with your notes and send it as a reference.
Please refer to the linked article for more details.
 Ortho Capture
Capture the images in the current viewing direction and top/bottom/left/right from the current viewing direction.
| Sync View |
When on, you can rotate or zoom in/out the center image. The other images will be adjusted simultaneously as fixed viewpoints as you move the center image. When off, you can pan, rotate, or zoom in/out all images individually. |
| Save Each Image Separately | Save each image in high resolution. |
| Show Texture | Turn on/off the texture for the model. |
| Reassign Data |
Change the data for maxilla/mandible with the Reassign Data feature. You can use the changed data to create and utilize the result images of Ortho Capture.
|
The images saved from Ortho Capture are added as files to the case file list.
By clicking the edit icon, you can use the [Image Capture and Memo] feature to annotate additional information on the Ortho Capture image.
 Fill Holes
Fill holes in 3D mesh data.
Please refer to the linked article for more details.
 Trimming
Trimming provides various tools to edit data.
The selected 3D mesh data can be edited using different tools located at the bottom of the window.
| Selection |  |
Smart Teeth Selection |
Automatically select all teeth of the arch, leaving out gingiva parts. ℹ️ Note This function is only available for the scan data acquired using Medit Scan for Clinics with the "Use GPU" option on. |
 |
Smart Single Tooth Selection | Automatically select the area of a single tooth with a click. You can click or drag on the tooth. | |
 |
Polyline Selection | Select all entities within a polyline shape drawn on the screen. | |
 |
Brush Selection | Select all entities on a freehand-drawn path on the screen. Only the front face will be selected. The brush comes in three different sizes. | |
| Adjustment of Selected Area |  |
Shrink Selected Area | Reduce the selected area each time you press the button. |
 |
Expand Selected Area | Expand the selected area each time you press the button. | |
 |
Invert Selected Area | Invert the selection. | |
| Deselection |  |
Selection/Deselection | When on, deselect the area using various tools. |
 |
Clear All Selection | Clear all selected areas. | |
 |
Delete Selected Area | Delete the data from the selected area. |
1. Select the area you want to trim with the area selection tools.
ℹ️ Note
The Polyline trimming tool selects all entities within a polyline shape drawn on the screen, while the brush trimming tool selects only the front face data.
2. You can invert, shrink, or expand the selection with the following three tools.
- Invert Selected Area
- Shrink Selected Area
- Expand Selected Area
3. You can deselect the selected areas with the Delete Selected Area tool.
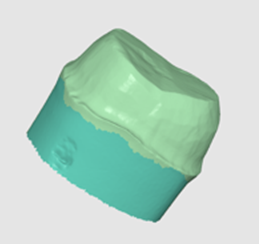
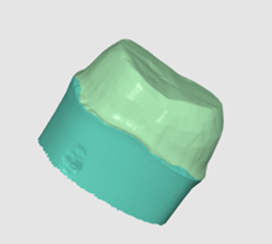
 Optimize Occlusion Alignment
Optimize the occlusion alignment. You can choose the target data and adjust the occlusion alignment.
Compensation Level
| Low |  |
|
| Mid | 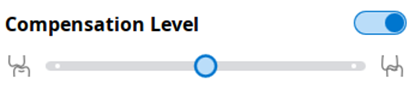 |
|
| High | 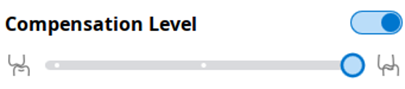 |
|
| Off | 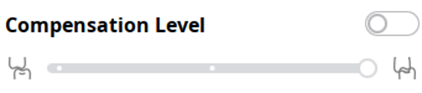 |
Optimize Occlusion Alignment is also available in Medit Scan for Clinics.
 Mandibular Movement
You can play the mandibular movements recorded in Medit Scan for Clinics to see the dynamic occlusal contacts between the upper and lower dentitions.
 |
Free Movement | Play the recording of free mandibular movement. |
 |
Left Lateral Movement | Play the recording of the mandible moving to the left. |
 |
Right Lateral Movement | Play the recording of the mandible moving to the right. |
 |
Protrusive Movement | Play the recording of the mandible moving forward. |
Mandibular Movement is also available in Medit Scan for Clinics.
Manage Multi Occlusion Data in File Viewer
You can get multiple results of occlusion data from Medit Scan Application.
Medit Link provides the function to manage the results through the "File Viewer."
How to manage multiple results
When the user gets multiple occlusion results from Medit Scan for Clinics, Medit Link provides the option to select a result.
The list of results is listed by name, and you can select one item.
The selected model will be shown in the "Data Tree" and "Model Display Area."
You can collapse the list and change the item using the arrow icons.
Utilizing the multi occlusion result
Your CAD system's multi occlusion result can be used. For a simple work process to use the multi-occlusion result with exocad, see the instructions below.
1. Move to the CAD tab after getting the multiple occlusion result from the scan app.
2. Fill out the CAD work information, then click the "CAD" button in the top-right corner.
3. Click "Confirm" after selecting the occlusal result you'll use primarily for CAD work.
4. In the exocad, the selected occlusion group is shown.
5. Click "Tools > Add/Remove Mesh" in "Wizard Mode."
6. Choose "Generic visualization mesh" as the mesh type and click "Load."
7. From the working folder, select the additional occlusion data to use in CAD work.
8. Continue with the CAD work by referring to the imported data.
Comments
0 comments
Please sign in to leave a comment.